pom.xml과 application.properties 세팅을 마쳤다면 끝난 것과 다름없다.
제공 문서 확인
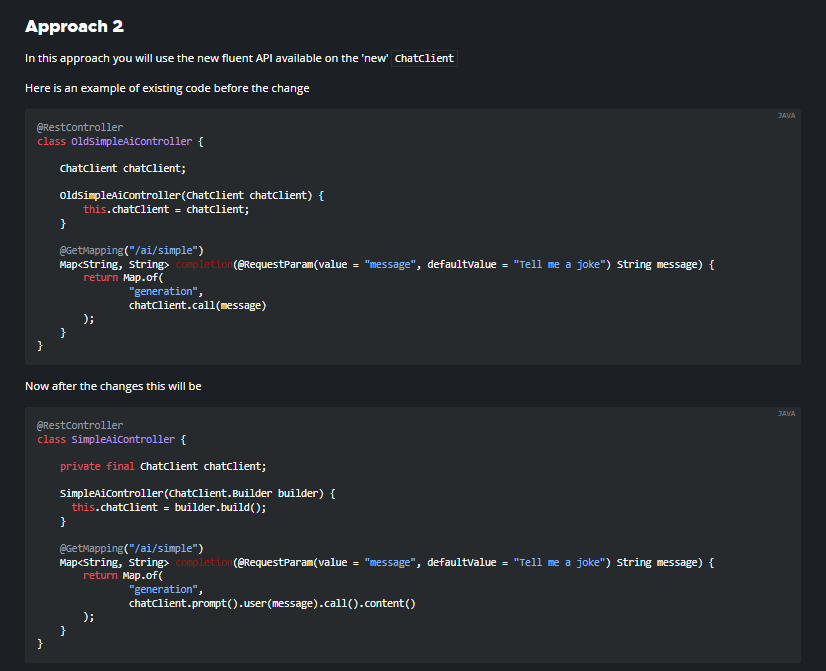
Spring 에서는 총 3가지의 접근 방식을 설명해 주고 있다. 나는 일단 Approch2 를 이용하여 코드를 구성 해 보았다.


Approch2 는 ChatClient 라는 인터페이스를 사용하고, 기존에는 chatClient.call 로 응답을 받던 것것이 chatClient.prompt().user.(message).call().content() 로 변경 되었다고 한다.
최종 코드
package com.example.demo.springAi;

import org.springframework.ai.chat.client.ChatClient;
import org.springframework.web.bind.annotation.GetMapping;
import org.springframework.web.bind.annotation.RequestMapping;
import org.springframework.web.bind.annotation.RequestParam;
import org.springframework.web.bind.annotation.RestController;

import java.util.Map;

@RequestMapping("/api")
@RestController
public class ChatController {

    private final ChatClient chatClient;

    ChatController(ChatClient.Builder builder) {
      this.chatClient = builder.build();
    }

    @GetMapping("/chat")
    Map<String, String> completion(@RequestParam String message) {
        return Map.of(
                "답변",
                chatClient.prompt().user(message).call().content()
        );
    }
}
결과
이렇게 chatGpt가 결과를 보여준다!
포스트맨으로 확인까지 하면 SpringAi 로 스프링부트에 chatGPT 연결 끝!

'spring 스프링' 카테고리의 다른 글
| The method builder() is undefined for the type 오류 (해결1) (0) | 2025.04.04 |
|---|---|
| 왜 setter를 지양해야 하는가 (0) | 2025.04.02 |
| SpringAI 로 OpenAI 의 ChatGPT 만들기 _ 01 (기초세팅) (0) | 2024.07.25 |
| 이클립스에 스프링 설치하고 스프링부트 프로젝트 생성 (0) | 2024.07.19 |
| [HTTP] Get 방식과 Post 방식의 차이점 (0) | 2023.09.05 |
